
Kool King Air Conditioner Instruction Manual: A Comprehensive Guide
This manual details the operation and maintenance of your Kool King unit, referencing production plans from 1980, ensuring optimal performance and longevity․
Welcome to the world of Kool King cooling! For decades, Kool King has been a trusted name in providing reliable and efficient air conditioning solutions․ This manual serves as a comprehensive guide to understanding, operating, and maintaining your Kool King air conditioner․
Rooted in a strong production history – with documented plans dating back to 1980 as evidenced by available production documentation – Kool King has consistently strived for innovation and quality․ This commitment extends to ensuring our customers have access to clear, concise instructions for maximizing their unit’s performance․
Whether you’re a first-time user or a seasoned owner, this manual will equip you with the knowledge to enjoy cool, comfortable air for years to come․ We’ll cover everything from initial setup to troubleshooting, helping you get the most out of your investment․
Understanding Your Kool King Model
Identifying your specific Kool King model is crucial for accessing the correct information and ensuring proper maintenance․ While Kool King’s legacy stretches back to production planning in 1980, models have evolved․ Locate the model number and serial number typically found on a label affixed to the unit’s exterior – often on the side or back panel;
This information is vital when contacting customer support or ordering replacement parts․ Different models may feature varying functionalities, control schemes, and component layouts․ Refer to the diagrams and specifications later in this manual, corresponding to your specific model number․
Understanding these details will allow you to tailor your operation and maintenance practices for optimal performance and longevity of your Kool King air conditioner․

Safety Precautions & Warnings
Prioritize safety when installing and operating your Kool King air conditioner․ Disconnect power before any maintenance, including filter cleaning or coil inspection․ Never attempt repairs beyond your skill level; consult a qualified technician․ Ensure proper grounding to prevent electrical shock․
Keep flammable materials away from the unit․ Do not operate the air conditioner with a damaged power cord or plug․ Avoid obstructing airflow around the unit, as this can cause overheating․ This unit, even with its history dating back to 1980 production plans, requires careful handling․

Warning: Improper installation or operation can lead to hazards․ Always follow these precautions to ensure safe and reliable performance․
Initial Setup and Installation
Before installation, carefully unpack your Kool King air conditioner and inspect for any shipping damage․ Review the technical specifications to ensure compatibility with your electrical system․ Proper installation is crucial for optimal performance, referencing even early production plans from 1980․
Ensure the installation location meets the requirements outlined in the ‘Preparing the Installation Location’ section․ Securely mount the unit following the instructions in ‘Mounting the Air Conditioner Unit’․ Double-check all connections before powering on․
Important: Incorrect installation can void the warranty and compromise safety․ If unsure, consult a qualified HVAC professional․
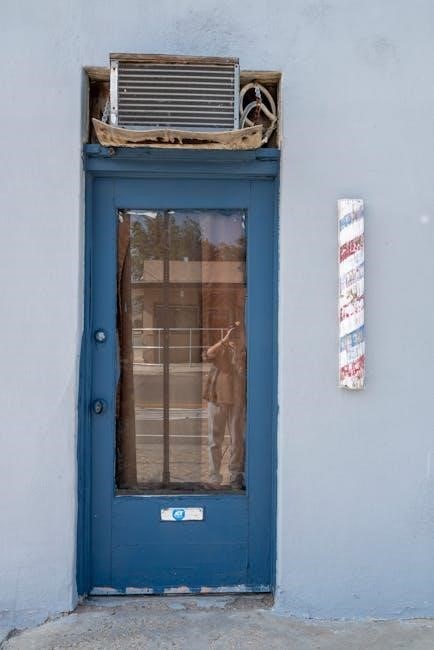
Preparing the Installation Location
Select a location that provides adequate ventilation and is protected from direct sunlight․ Ensure the floor or mounting surface can support the unit’s weight, considering the models produced even back in 1980․ Verify proximity to a suitable power outlet, meeting the electrical specifications detailed in the manual․
Maintain sufficient clearance around the unit for airflow and maintenance access․ Check for any obstructions, such as furniture or curtains, that may impede operation․ Confirm the location allows for proper condensate drainage, preventing water damage․

Important: Improper location selection can reduce efficiency and shorten the unit’s lifespan․
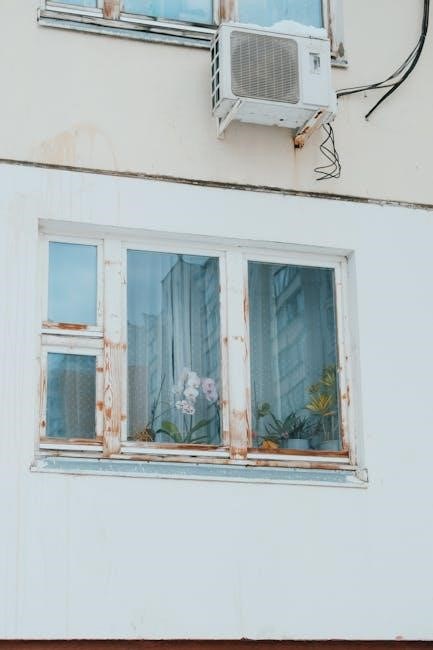
Mounting the Air Conditioner Unit
Securely attach the mounting bracket to a sturdy wall using appropriate screws and anchors, ensuring it can bear the unit’s weight – a critical consideration given the production era of 1980․ Carefully lift the air conditioner unit onto the bracket, aligning the mounting points correctly․
Verify the unit is level to prevent vibrations and ensure proper drainage․ Tighten all mounting screws firmly, but avoid over-tightening, which could damage the unit or wall․ Double-check the stability of the installation before proceeding․

Caution: Incorrect mounting can lead to unit failure or personal injury․ Professional installation is recommended if you are unsure․
Operating Instructions
Before operation, ensure the air conditioner is properly installed and the filters are clean․ Familiarize yourself with the control panel, understanding each button’s function – a key aspect considering the 1980 production context of Kool King units․
Initial power-up requires connecting the unit to a grounded outlet․ The control panel allows for temperature adjustment, fan speed selection, and mode control (cooling, fan only)․ Observe the indicator lights to confirm the selected settings․
Always start with a moderate temperature setting and adjust as needed․ Avoid extreme temperature differences to optimize energy efficiency and comfort․ Regular operation will ensure consistent cooling performance․
Powering On and Basic Controls
To initiate operation, locate the power button, typically marked with a universal power symbol․ Press firmly to activate the unit; a ready indicator light will illuminate․ Kool King units, even those from the 1980 production era, generally feature straightforward controls․
Temperature adjustment is usually managed via up and down arrow buttons․ Each press alters the desired room temperature, displayed digitally or via a dial․ Fan speed control, often low, medium, and high, regulates airflow intensity․

Mode selection allows switching between cooling, fan-only, and potentially dehumidifying functions․ Refer to your specific model’s panel for precise labeling․ Ensure proper voltage before powering on․
Cooling Mode Operation
Engage cooling mode by selecting the designated icon or setting on your Kool King unit․ The compressor will activate, initiating the cooling process․ Adjust the temperature to your desired comfort level using the control panel’s temperature adjustment buttons․
Optimal cooling performance relies on closed windows and doors, minimizing warm air infiltration․ Fan speed influences cooling rate; higher speeds circulate air more rapidly․ Monitor the room temperature to ensure efficient operation․
Kool King units, even those reflecting 1980 production standards, are designed for effective cooling․ Some models may include a “dry cool” function for reduced humidity․ Regularly check the air filter for optimal airflow․
Fan Mode Operation
Activate fan mode by pressing the corresponding button on your Kool King air conditioner․ In this mode, the compressor remains off, and only the fan circulates air within the room․ This is ideal for air circulation without cooling, or after the cooling cycle has completed․
Select from multiple fan speeds – low, medium, and high – to customize airflow intensity․ Fan mode is energy-efficient, consuming less power than cooling mode․ It’s perfect for maintaining air movement on milder days․
Even older Kool King models from the 1980 production era offer reliable fan operation․ Ensure the fan blades are clean and unobstructed for optimal performance․ Regularly inspect for any unusual noises during operation․
Maintenance and Cleaning
Regular maintenance is crucial for your Kool King air conditioner’s efficiency and lifespan․ Consistent cleaning prevents dust and debris buildup, ensuring optimal performance․ Prioritize filter cleaning and coil maintenance for best results․
Following a cleaning schedule, especially during peak usage, is recommended․ Neglecting maintenance can lead to reduced cooling capacity and increased energy consumption․ Even units from the 1980 production run benefit from routine care․
This section details procedures for filter replacement and coil cleaning, providing step-by-step instructions․ Proper maintenance extends the life of your Kool King unit and maintains air quality․ Always disconnect power before any cleaning procedure․
Filter Cleaning and Replacement
Your Kool King air conditioner’s filter protects the unit from dust and airborne particles, maintaining air quality and cooling efficiency․ Regular cleaning or replacement is essential – typically every month during heavy use, or as needed․
To clean a reusable filter, gently vacuum or wash with mild soap and water․ Ensure it’s completely dry before reinstalling․ For disposable filters, simply replace with a new one of the correct size․ Refer to your model’s specifications․
A clogged filter restricts airflow, forcing the unit to work harder, potentially leading to decreased performance and higher energy bills․ Even older 1980 models require filter maintenance for optimal function․
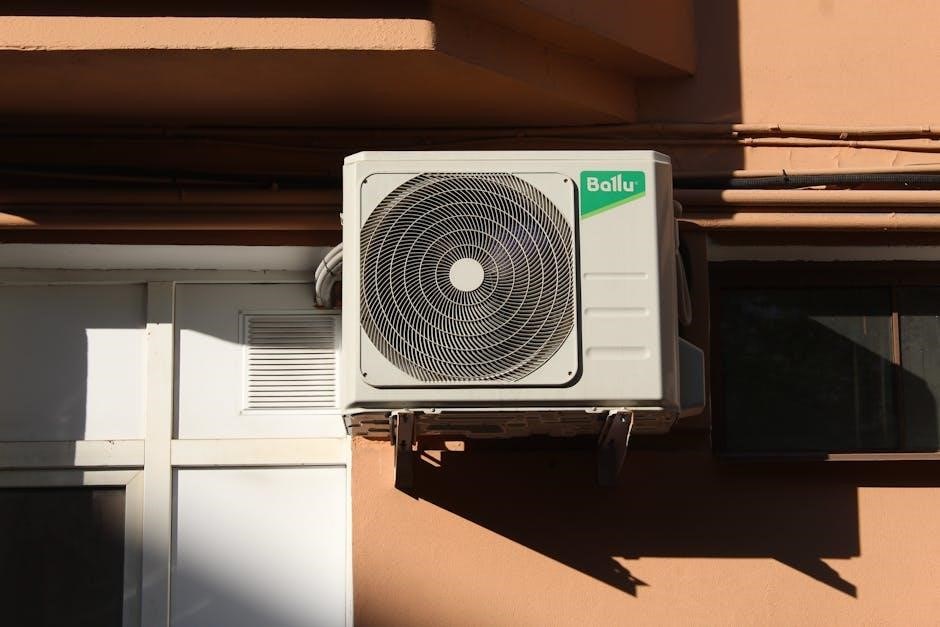
Coil Cleaning Procedures
Maintaining clean condenser and evaporator coils is crucial for your Kool King’s efficiency․ Over time, dust and debris accumulate, hindering heat transfer and reducing cooling capacity․ Disconnect power before any cleaning!
For the outdoor condenser coil, use a fin comb to straighten bent fins, then gently spray with a coil cleaner (available at most hardware stores)․ Rinse thoroughly with water, avoiding electrical components․ The evaporator coil, located inside, requires similar care, but professional cleaning is often recommended․
Even units dating back to the 1980 production era benefit from coil cleaning․ Regular maintenance extends the lifespan and ensures optimal performance, saving energy and money․
Troubleshooting Common Issues
Encountering problems with your Kool King? This section addresses frequent concerns․ Before contacting support, check these simple solutions․ If the unit isn’t cooling, verify the thermostat setting and air filter cleanliness․ A frozen coil can also restrict airflow – switch to fan-only mode to thaw it․
Water leaks often indicate a clogged drain line․ Locate the drain opening (usually near the indoor unit) and clear any obstructions․ For units produced even in 1980, drainage issues are common with age․
If issues persist, consult a qualified HVAC technician․ Do not attempt repairs beyond your expertise, as this could void the warranty or cause further damage․
Unit Not Cooling Properly
If your Kool King isn’t delivering cool air, several factors could be at play․ First, ensure the thermostat is set to “Cool” and the desired temperature is lower than the room temperature․ A dirty air filter restricts airflow, significantly reducing cooling efficiency – replace or clean it immediately․
Check for blocked vents or return air grilles․ Ice buildup on the evaporator coil, potentially stemming from 1980 production models, hinders performance; switch to “Fan Only” to thaw․
Confirm the outdoor unit isn’t obstructed by debris․ If problems continue, a refrigerant leak or compressor issue may require professional attention․
Water Leaks and Drainage
Water leaks from your Kool King air conditioner often indicate a drainage issue․ A clogged condensate drain line is a common culprit; flush it with a cup of diluted bleach or vinegar to clear obstructions․ Inspect the drain pan for cracks or damage, especially in older 1980 units․
Ensure the unit is properly tilted to facilitate water drainage․ Excessive humidity can overwhelm the system, leading to overflow; consider a dehumidifier․
If leaks persist, check the connections between the indoor and outdoor units for proper sealing․ A professional HVAC technician may be needed to diagnose and repair more complex issues․
Remote Control Functionality (If Applicable)
If your Kool King air conditioner model includes a remote control, it offers convenient operation from a distance․ The remote typically controls power, cooling modes, fan speeds, and temperature settings․ Ensure the remote has fresh batteries for optimal performance․

Point the remote directly at the air conditioner’s sensor for reliable communication․ Some remotes feature a “turbo” mode for rapid cooling and a “sleep” mode for energy-efficient overnight operation․ Refer to the remote’s specific button layout for detailed functions․
Lost remotes can often be replaced; contact Kool King support with your model number․
Energy Saving Tips for Kool King Units
Maximize efficiency with your Kool King air conditioner by following these simple tips․ Regularly clean or replace the air filter to ensure optimal airflow, reducing strain on the unit․ Utilize the “sleep” or timer function to avoid unnecessary cooling during unoccupied periods․
Seal windows and doors to prevent air leakage, maintaining a consistent temperature․ Consider using curtains or blinds to block direct sunlight, lessening the cooling load․ Avoid setting the thermostat excessively low; each degree lower increases energy consumption․
Proper insulation in your home significantly reduces cooling demands․
Technical Specifications & Diagrams
Kool King air conditioners, even those based on 1980 production plans, feature specific technical details crucial for understanding operation and maintenance․ Voltage requirements typically range from 115V to 230V, depending on the model․ Cooling capacity is measured in BTUs (British Thermal Units), varying from 5,000 to 30,000 BTU/hr․
Refrigerant type, historically often R-22, may differ in newer units․ Detailed wiring diagrams are essential for troubleshooting and repair, illustrating component connections․ Physical dimensions and weight are provided for installation planning․ Refer to the specific model number for accurate specifications․
Energy Efficiency Ratio (EER) indicates cooling output versus energy input․
Warranty Information & Support
Kool King air conditioner warranties, even those relating to units produced according to 1980 plans, typically cover defects in materials and workmanship․ Standard warranties often extend for one year from the date of purchase for parts and labor․ Extended warranties may be available for purchase, offering longer coverage periods․
To initiate a warranty claim, retain your proof of purchase and contact Kool King’s customer support․ Support is accessible via phone, email, and potentially online chat․ Authorized service centers are available for repairs․ Warranty limitations may apply, excluding damage from misuse or improper installation․
Contact information is available on the Kool King website․
Kool King Air Conditioner Production History (1980 Context)
In 1980, Kool King operated within a burgeoning HVAC market, focusing on reliable, though comparatively simpler, air conditioning solutions․ Production planning documents from that era, like the Shuhail Ibis HVAC Report, reveal a focus on cost-effective manufacturing and meeting growing demand․ Company background indicated a commitment to durable designs, prioritizing functionality over advanced features․
Production strategies centered on efficient assembly lines and sourcing readily available components․ Analysis of the 1980 plans suggests a limited model range, catering primarily to residential and small commercial applications․ Quality control procedures, while present, were less sophisticated than modern standards; Understanding this historical context informs the operation of vintage Kool King units․